Volume Annotation Tools
Volume annotation in WEBKNOSSOS allows you to label and segment 3D structures in your dataset. This page covers the available tools and best practices for efficient volume annotation.
 Trace Tool: Create precise boundary definitions by drawing outlines around structures. This tool is particularly useful when accuracy is crucial. For added precision consider using a pen input device.
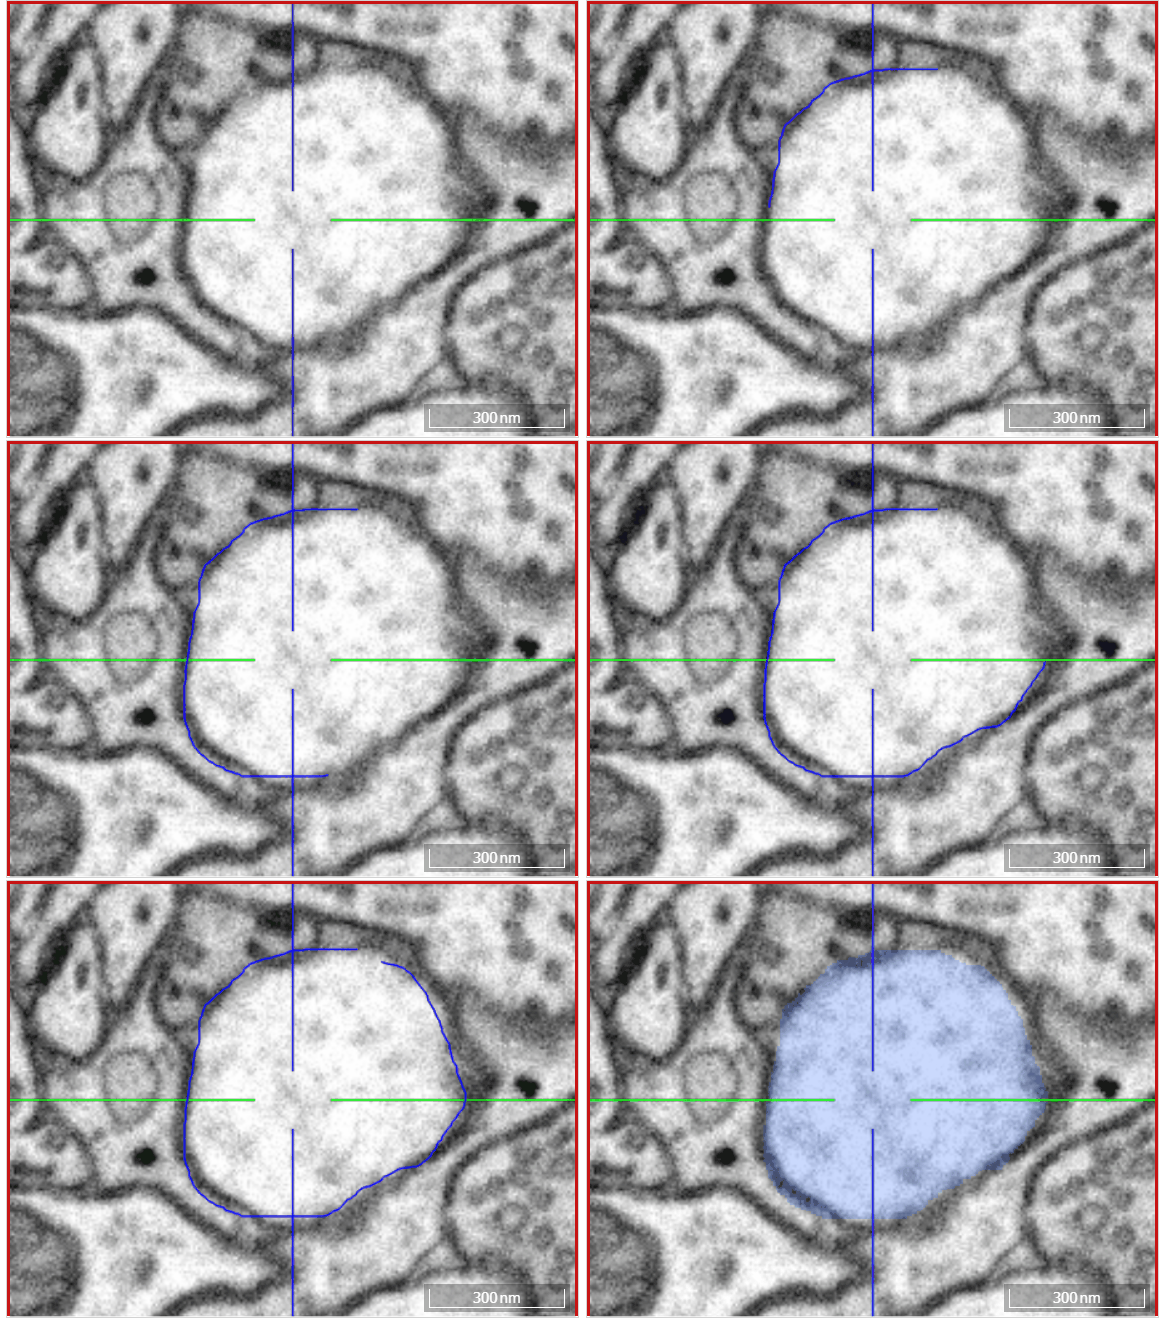
 Brush Tool: Paint directly onto the dataset to mark regions of interest. The brush size is adjustable using Shift + Mousewheel. Drawing around objects in one continuous motion will automatically fill the inside area.
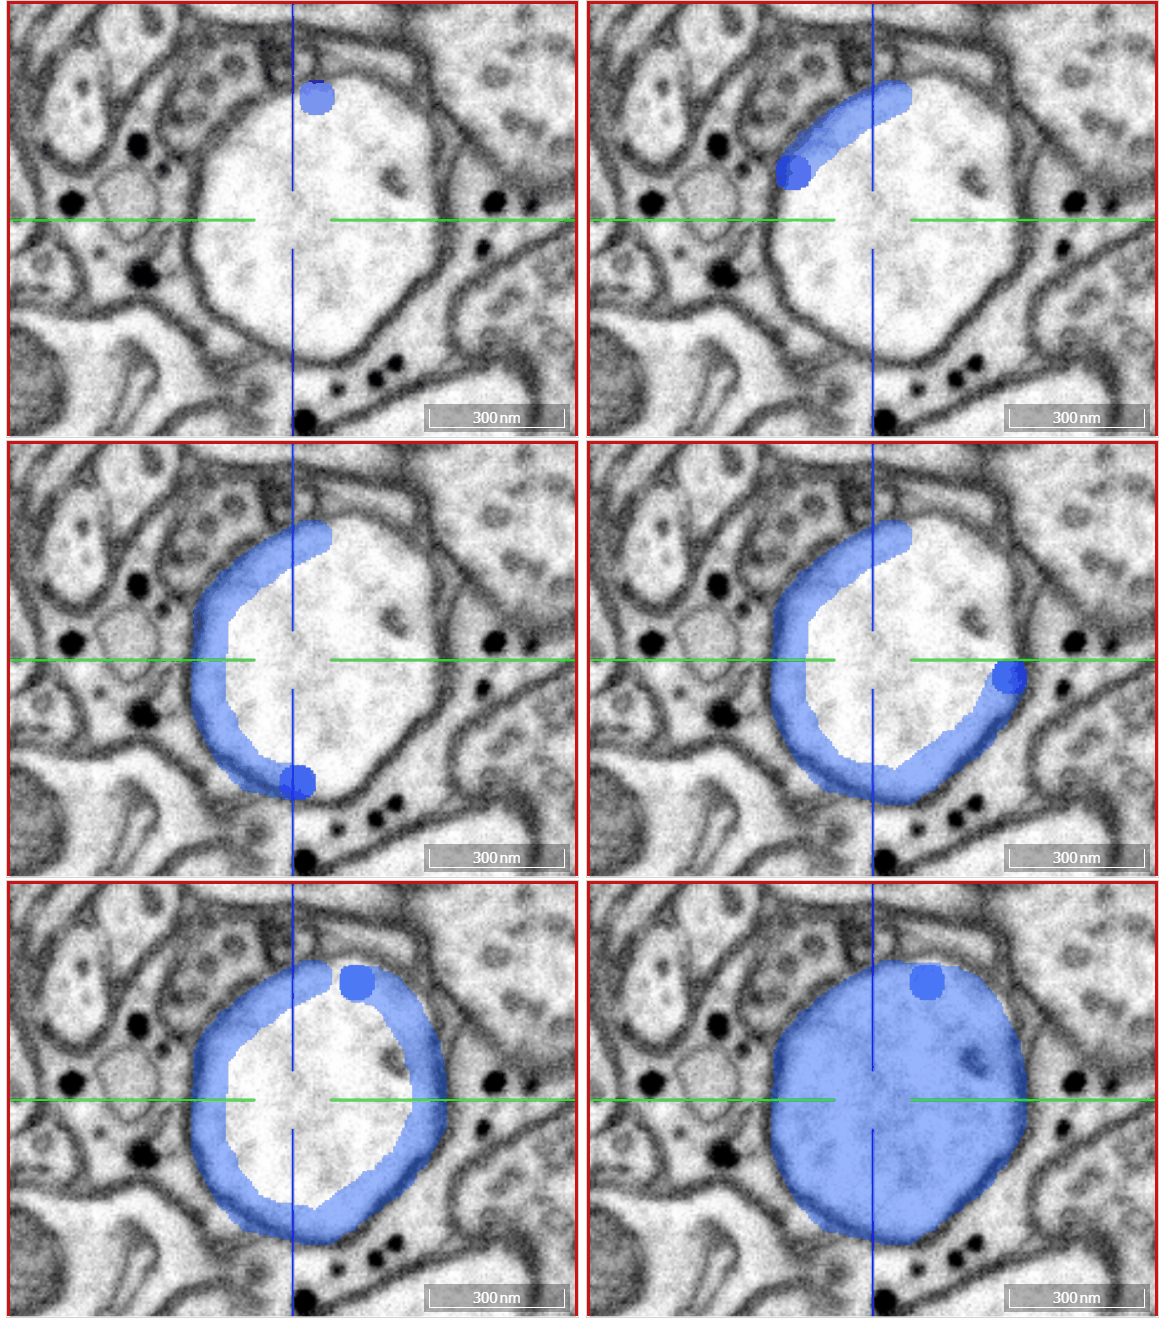
 Eraser (Trace/Brush): Remove existing labels by drawing over them. Functions identically to the Trace/Brush tools, with adjustable size using Shift + Mousewheel.
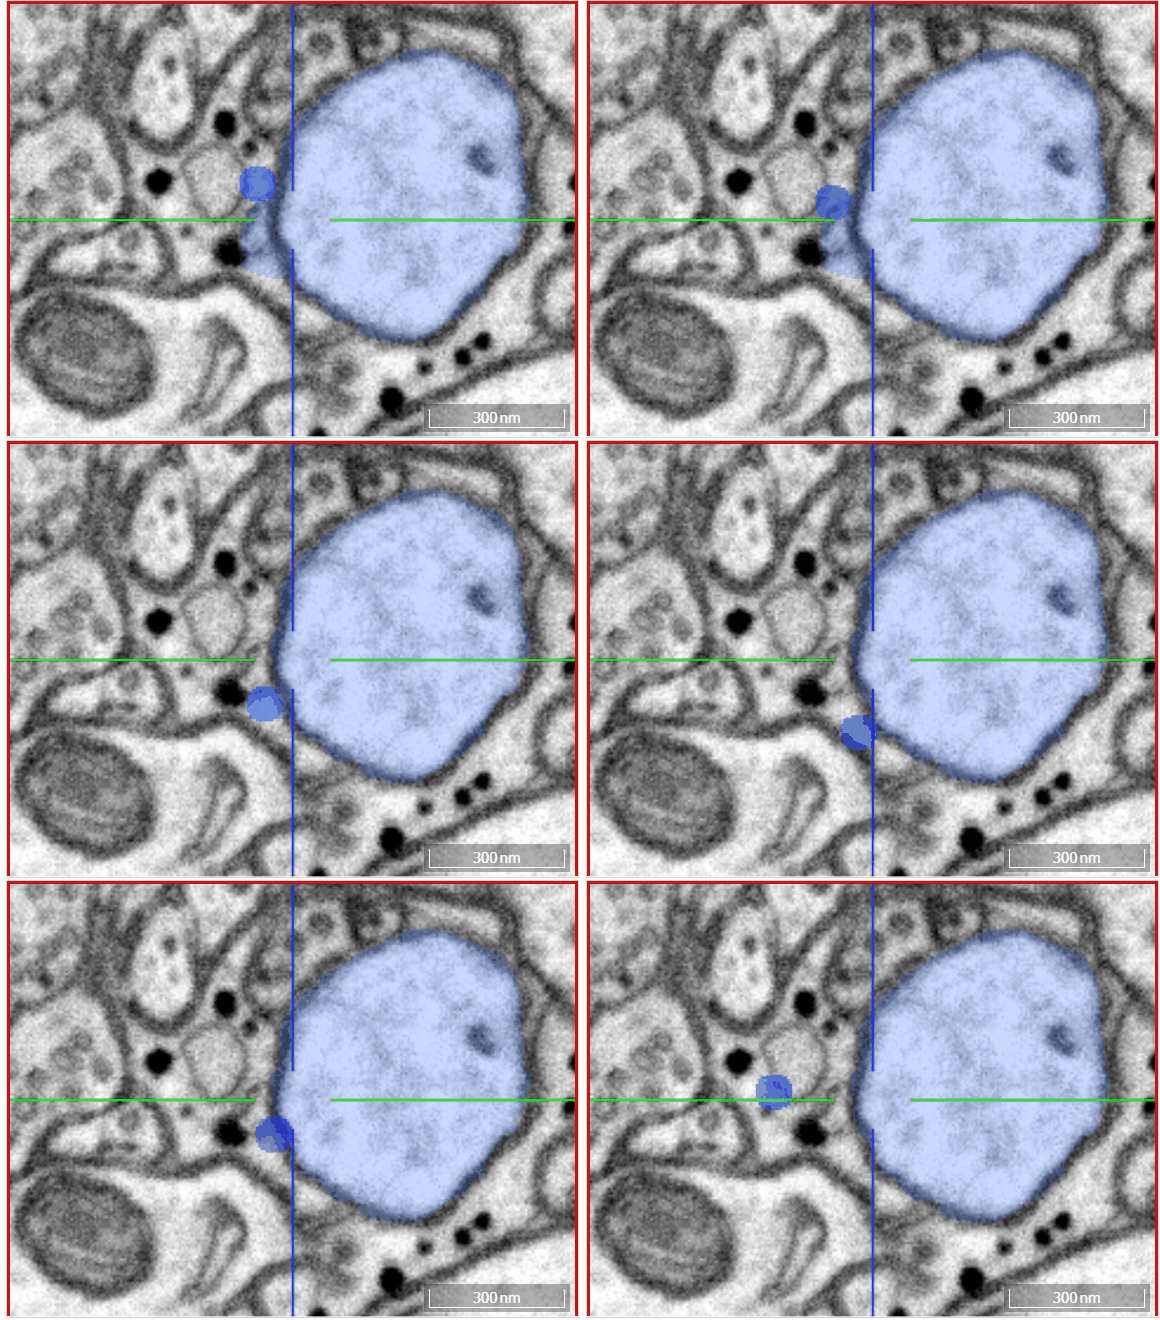
 Fill Tool: Fill regions with volume annotations up to segment boundaries or viewport edges. Useful for:
- Filling holes in segments
- Relabeling segments with different IDs/colors
- Quick corrections of small areas
- The fill behavior can be modified using the 2D/3D fill modifiers (see below).
- This tool only takes existing labels into account and does not look at any other underlying (microscopy) layers. Have a look at the quick-select-tool for quickly annotating new structures.
 Quick Select: Automatically annotate segments using either:
- Threshold-based selection mode
- AI-based segmentation (powered by Segment Anything Model 2) The AI mode works across various imaging modalities and can significantly speed up annotation workflows. See the Quick-select tool section for detailed usage.
 Proofreading: Fix merge and split errors in automated segmentations using the underlying supervoxel graph by combining and breaking apart segments. Read more about proofreading.
In the Segments tab on the right-hand side panel, you can find all segment IDs which are available in your annotation. You can rename and organize segments as needed.
The active segment ID under the cursor can be found in the status bar at the bottom of the screen or through the context menu when right-clicking.
Keyboard Shortcuts
For faster workflows, refer to the keyboard shortcuts guide.
Tool Modes and Extras
The following interactions and modes become available when working with some of the volume annotation tools. They can be found in the toolbar:
 Create New Segment ID: Creates a new segment ID for labeling with a different color and identifier. New segments will be added to the segments list in the right sidebar automatically.
 Change Brush Size: Changes the size and radius of the brushing tool. Presets of small, medium and large brush sizes are available which can be modified to suit your workflows.
 Overwrite Everything: When using the brush or trace tool for labeling, you can annotate any voxel without considering whether it has already been labeled as a different segment or if it is unlabelled. This allows you to draw over existing segments.
 Only Overwrite Empty Areas: In contrast to the
 Overwrite Everything modifier, this modifier forces the brush & trace tools to only label voxels without any segment ID ("empty areas"). This is useful when annotating segments that directly touch each other to avoid accidental overwrites.
 Interpolation/Extrusion: Annotate a segment, skip a few sections in the Z direction, and annotate it again. Now, you can interpolate between the two segments. Read more on the interpolation/extrusion below.

 2D/3D Fill: Modifies the flood filling tool to work in 2D (in-plane only) or 3D (volumetric fill/re-labeling). 3D flood fill is constrained to a small, regional bounding box for performance reasons. Read more about flood fills below.
![]() Restrict Fill by Bounding Box: When enabled, the fill operation will be restricted by the smallest bounding box that encloses the clicked position. This feature can be useful when correcting segmentation in a small bounding box (e.g., when curating training data).
Restrict Fill by Bounding Box: When enabled, the fill operation will be restricted by the smallest bounding box that encloses the clicked position. This feature can be useful when correcting segmentation in a small bounding box (e.g., when curating training data).
Quick-select tool
The Quick Select tool offers AI-powered automatic segmentation, powered by Segment Anything Model 2. Simply draw a selection around your target structure, and WEBKNOSSOS will automatically segment it for you.
Operating Modes
AI Mode (Default)
- Activate the "AI" button in the toolbar
- Works across various imaging modalities
- Segments structures based on machine learning
Threshold Mode
- Disable the "AI" button
- Uses intensity-based segmentation
- Fills from the center of your selection
Usage Steps
- Select the Quick Select tool from the toolbar
- Choose your preferred mode (AI or threshold)
- Click the settings icon to configure:
- Number of sections to process (only AI mode)
- Preview mode for real-time parameter adjustment
- Draw a rectangle around your target structure or click on it directly
- WEBKNOSSOS will automatically segment the structure across your specified sections
Volume Interpolation
The Volume Interpolation feature accelerates your annotation workflow by automatically filling in intermediate slices:
- Label your structure in one slice (e.g., at z=10)
- Skip several slices and label the structure again (e.g., at z=14)
- Press the "Interpolate" button or use shortcut V to automatically generate labels for the slices in between
Tip
When working with tasks, this feature needs to be explicitly enabled by the task creator.
Warning
Always review the interpolated slices, as the automated results are based on heuristics and may require adjustments.
Volume Extrusion
Volume Extrusion is an alternative to interpolation that preserves the exact shape of your annotation across multiple slices:
- Label your structure in one slice (e.g., at z=10)
- Move to a target slice (e.g., z=12)
- Click the "Extrude" button in the toolbar to copy your annotation to all slices in between
Extrusion vs. Interpolation
Unlike interpolation, extrusion maintains the exact shape of your source annotation. The structure is copied without any shape adaptation between slices.
You can find the extrude button in the toolbar or use the dropdown menu next to the interpolation/extrusion button.
Volume Flood Fills
WEBKNOSSOS supports volumetric flood fills (3D) to relabel a segment with a new ID. Instead of having to relabel segment slice-by-slice, WEBKNOSSOS can do this for you. This operation allows you to fix both split and merge errors:
- For split errors: Combine two segments by relabeling one segment with the ID of the other. Since this operation is fairly compute-intensive you might be better of with the Merger Mode.
- For merge errors: You have to manually split two segments at their intersection/border, e.g. a cell boundary. Use the eraser brush and make sure to establish a clear cut between both segments on a slice-by-slice basis. Both segments must not touch any longer. Create a new segment ID from the toolbar and apply it to one of the partial segments that you just divided.
Performance Consideration
For performance reasons, 3D flood-fills only work in a small, local bounding box. For large-scale modifications, consider using the proofreading tool instead of 3D flood-fills, as it's optimized for handling larger volumes.
- Get Help
- Community Forums
- Email Support