Users
Sign Up & Invitations for New User Accounts
On webknossos.org, users can either sign up for a WEBKNOSSOS account by themselves or be invited through email to join an existing organization by co-workers or collaborators.
As an admin or team manager, you can invite users to join your WEBKNOSSOS organization by clicking the Invite Users button at the top of the Users list available from the Admin menu in the navbar. This will open a popup where you can enter a list of email addresses, which will receive a custom invitation link. Users that click on this link are automatically assigned to your organization, and will not need manual activation.
During the invitation process, you can already assign the new users' teams and permissions, so they are ready to work as soon as they accept.
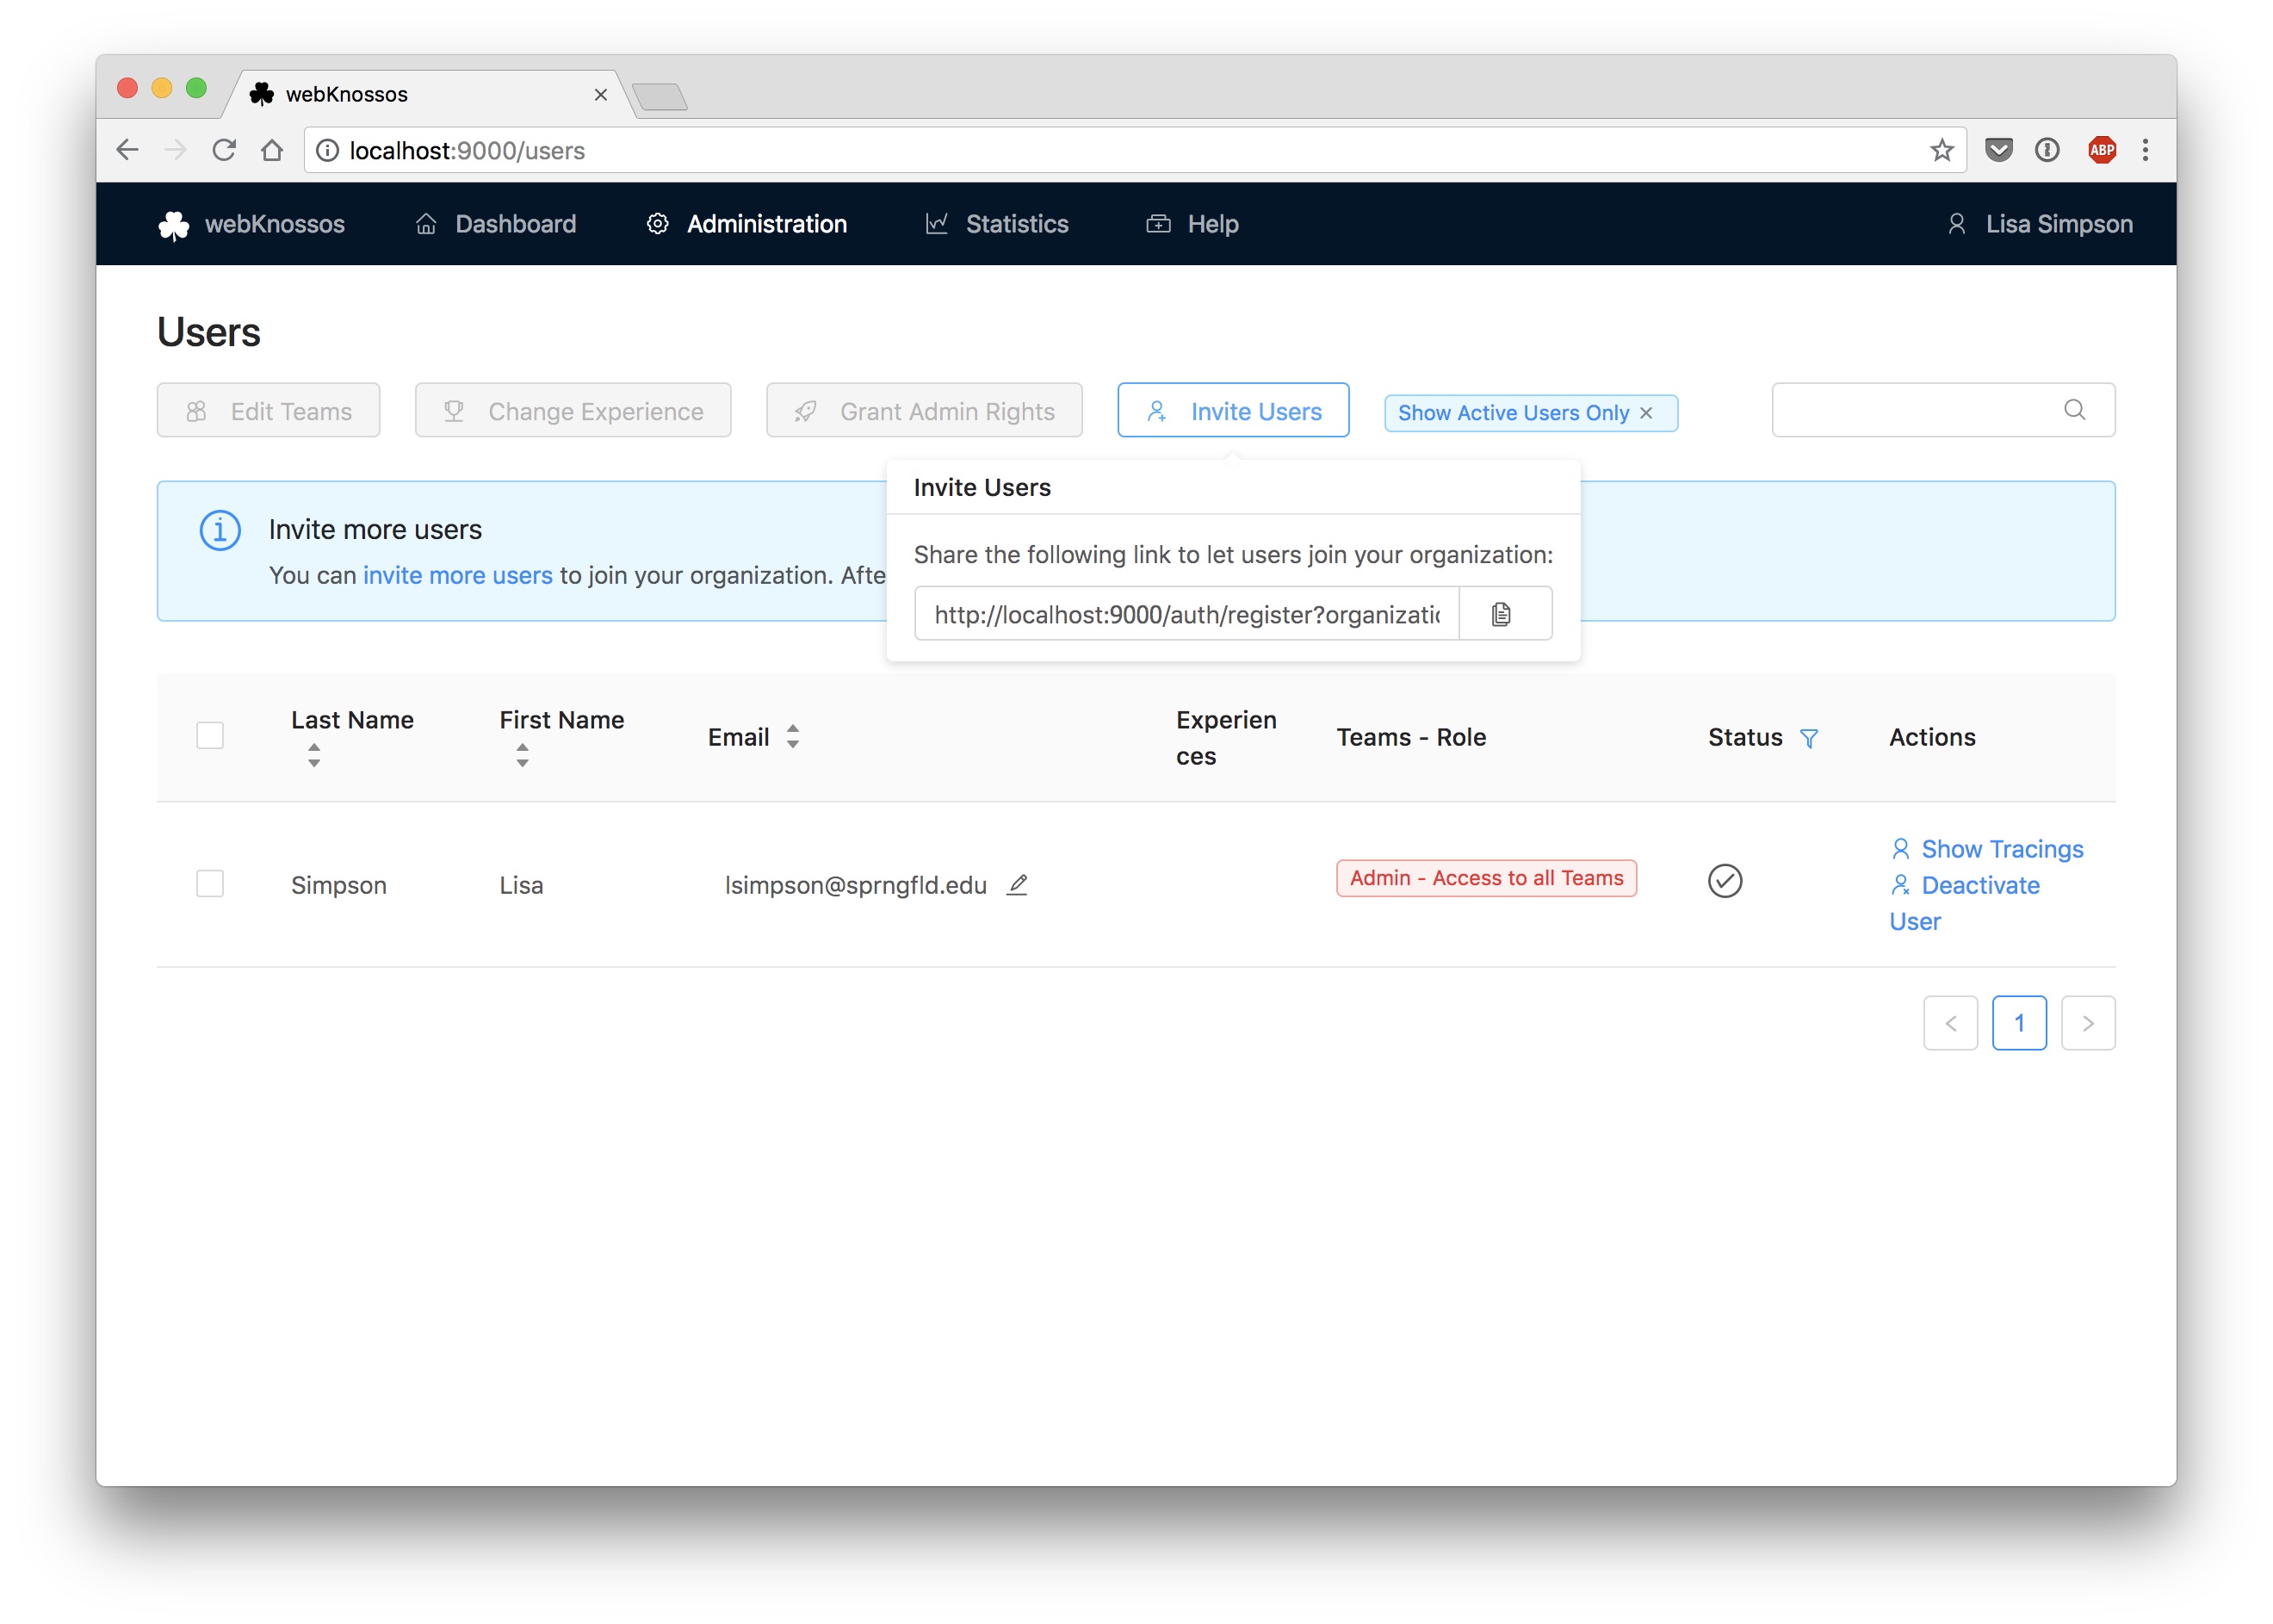
Send an invite link to new users
Activating New Users
On most WEBKNOSSOS instances — including webknossos.org — new users join by accepting an email invitation (see above) and are activated automatically. No separate activation step is required.
Manual activation is only relevant on instances where this default behavior has been disabled and users self-register instead. In that case, self-signup accounts arrive deactivated and an admin or team manager has to activate them:
- Go to
Admin > Users. By default, the list only shows activated users, so switch theStatuscolumn filter toDeactivatedto find the pending accounts. - Click
Activate Userin the user's row. - You will be prompted to configure the user's teams and permissions. If you skip this step, the user can initially only see datasets belonging to the
Defaultteam.
To revoke a user's access, deactivate them from the same Admin > Users list (there is no hard-delete for users). A deactivated user can no longer log in but is retained for record-keeping, and can be reactivated later.
Adding Users to Teams
Teams help organize users into logical groups for better collaboration and access control. By assigning users to specific teams, you can manage dataset permissions, coordinate tasks, and streamline project workflows more efficiently.
To add or modify team assignments for users:
- Navigate to
Admin > Usersin the navigation bar - Select one or more users from the user list
- Click on
Edit Teams and Permissions - This opens a dialog showing all available teams and user permissions
- Select or deselect teams as desired for the selected users
- For each team, you can choose the user's role:
- Member (default): Basic team membership with standard permissions
- Team Manager: Extended permissions for team management
- Click
Set Teams & Permissionsto confirm your changes
Users can be members of multiple teams simultaneously. Team managers have additional permissions to manage team members and team-specific settings. For more information about user roles and permissions, see User Roles.
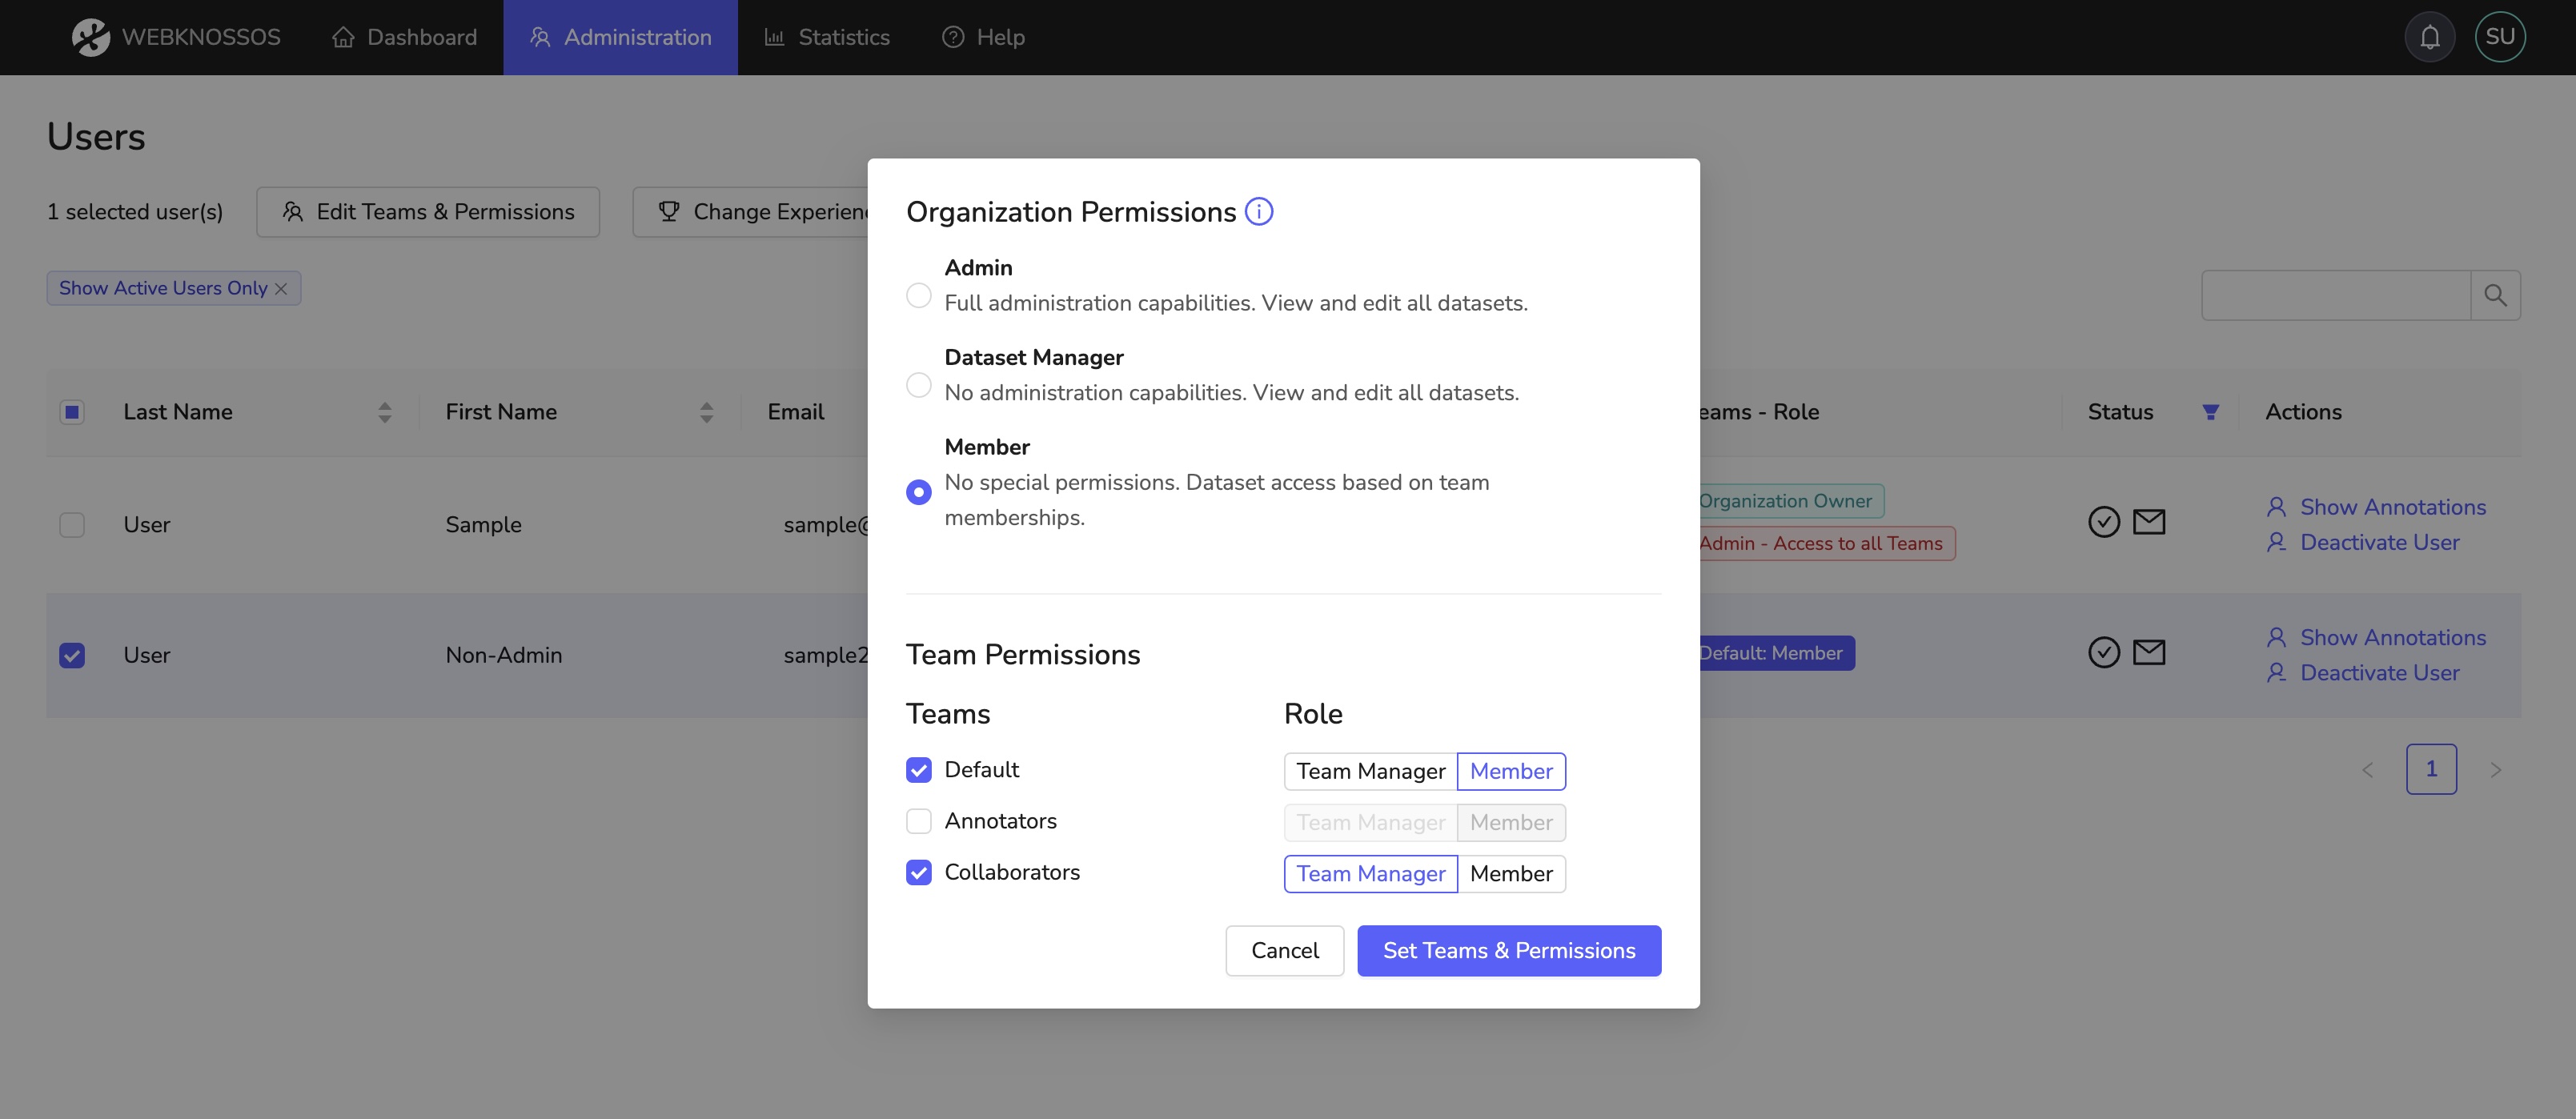
Teams and Permissions dialog
Experience Levels
For a fine-grained assignment to annotation tasks, each user can have one or more experience levels assigned to them. Based on their respective experience level, tasks may or may not be distributed to them.
Assign/Remove experience levels by selecting one/several users and clicking on the Change Experience button. In the pop-up window, you can select any existing experience from the dropdown or type the domain name of a new experience domain in the dropdown input.
Each experience domain is combined with a numeric value indicating the proficiency of the respective user.
E.g., a seasoned annotator may have the experiences nuclei: 10 and mitochondria: 7, while a rookie could start at nuclei: 1 to codify that they have not worked on mitochondria annotation at all and just started with their first nuclei reconstruction project.
Experience domains are referenced during task type and project creation and task distributing respectively. Domain names and values are arbitrary and can be customized to make sense for your organization.
- Get Help
- Community Forums
- Email Support