Import and Export Volume Annotations
Import Volume Annotations
Any volume annotation exported from WEBKNOSSOS or the WEBKNOSSOS Python library in a ZIP archive can be imported in one of two ways:
- From the dashboard — drag and drop the ZIP file onto the annotation list to create a new annotation. It will open automatically and appear in your annotation list.
- From within an open annotation — drop the ZIP file anywhere in the WEBKNOSSOS viewer to merge the imported data into the current annotation. The volume layer must already exist in the annotation before importing.
For importing skeleton-only (NML) files without volume data, see Import & Export in Skeleton Annotations.
Export Volume Annotations
To download an annotation, open Menu > Download, choose the data you want, and select a format (WKW or Zarr). You can also go to your annotation dashboard and click Download next to the annotation.
For a full overview of all export and download options — including TIFF cutouts and Python library access — see Data Export through the Web UI.
A volume annotation is exported as a .zip file containing two parts:
- An NML file — carries the annotation metadata, segment information, and layer configuration.
- A volume data
.zip— holds the actual voxel label data in either WKW or Zarr format.
Annotations created with the proofreading tool are exported differently: instead of voxel data, the ZIP contains the merge and split edits of the supervoxel graph. See Exporting Proofreading Results for details on the format, re-uploading, and limitations.
Merging volume annotation with fallback data
When annotating a volume layer, you can work on top of an existing segmentation from the dataset — known as a fallback layer. Rather than copying the entire segmentation upfront, WEBKNOSSOS stores only your edits in the annotation layer and reads everything else directly from the original segmentation. This keeps annotations lightweight while still letting you see and build on the existing data.
Once you are done annotating, you can permanently combine both layers into a single, self-contained segmentation in a new dataset. Your annotation edits take precedence wherever you made changes; the original fallback segmentation fills in the rest. This process is sometimes referred to as materialization.
To start it, go to the Layers tab in the left sidebar, hover over the three-dot menu next to the name of the volume layer, and select Merge this volume annotation with its fallback layer.
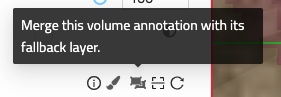
Layer menu entry to open the materialize volume annotation dialog
This opens a dialog that submits a long-running job to materialize the volume annotation into a new dataset. Materializing a volume annotation may take a long time, depending on the size of the annotation and the dataset.
You can also materialize annotations made with the proofreading tool. In that case, you need to select a bounding box to export. See Materializing a Proofread Segmentation.
Info
This feature is only available to admins and dataset managers, on webknossos.org or on managed instances that have the WEBKNOSSOS worker configured.
Restricting magnifications
Volume annotations can be stored at multiple magnifications — 1-1-1 being full resolution, 4-4-2 meaning downsampled by 4× in x/y and 2× in z, and so on. By default, edits are stored at every available magnification, which can significantly increase annotation size when labeling large structures such as nuclei.
Restricting the annotation to a coarser magnification reduces storage overhead and improves the responsiveness of annotation tools such as the brush — the browser has less data to update and upload with each stroke. Annotation quality is typically unaffected when the selected magnification matches your annotation granularity; choosing a too-coarse a magnification can reduce recoverable fine detail. The restriction is set when the volume layer is first created — either at annotation creation or when adding a new layer to an existing annotation.
When creating an annotation
On the dataset dashboard, click the three-dot menu next to New Annotation for the dataset you want to annotate. Use the magnification slider to exclude finer magnifications — for example, skipping 1-1-1 or the two finest magnifications is a common choice for large structures.
When adding a new volume annotation layer
In an open annotation, go to the Layers tab on the left sidebar and click Add Volume Annotation Layer at the bottom of the layer list. The same magnification slider is available there.
- Get Help
- Community Forums
- Email Support