Volume annotation
Volume Annotations & Proof-Reading
In addition to skeleton annotations, WEBKNOSSOS also supports volume/segmentation annotations. This annotation type lets you label voxel groups using efficient drawing tools.
Tools
Choose a drawing tool from the toolbar or press W to switch between them.
Move: Navigate around the dataset.Trace: Draw an outline around the voxel you want to label.Brush: Paint over the voxels you would like to label. Use SHIFT + Mousewheel to change the brush size.Erase (Trace/Brush): Erase voxels by drawing over them. Use SHIFT + Mousewheel to change the brush size.Fill Tool: Fill the clicked region with a volume annotation up to the next segment boundary (or the edge of your viewport). All neighboring voxels with the same voxel id as the clicked voxel will be labelled with the active segment ID. This is useful for filling a hole in a segment or relabeling a segment with a different ID/color.Segment Picker: Click a segment to use its label ID as the active segment ID and keep annotating with that ID.Quick Select: Annotate a segment automatically by drawing a rectangular selection over it. The tool operates in two different modes. When the "AI" button in the toolbar is activated, a machine-learning model is used to infer the selection. When the AI button is disabled, the tool operates on the intensity data of the visible color layer and automatically fills out the segment starting from the center of the rectangle. Next to the tool, there is a settings button which allows to enable a preview mode and to tweak some other parameters. When the preview is enabled, you can fine-tuned the parameters and see the preview update instantly.Proof Reading: Fix merge and split errors in automated segmentation. Read more about proofreading.
When using the trace or brush tool, a label can be added with Left Mouse Drag. Erasing is possible with the dedicated erase tools or with CTRL + Shift + Left Mouse Drag.
If you have enabled Classic Controls in the settings sidebar, erasing is also possible with Right Mouse Drag within the brush and trace tool (otherwise, right-clicking is mapped to open a context menu).
The following interactions and modifiers are available when working with the volume annotation tools:
Create New Segment ID: Creates a new segment ID for labeling. Note the little color indicator in the top right corner of the button visualizing the current color of the active segment ID. Read the explanation for the largest segment id here to understand how new IDs are generated.Change Brush Size: Changes the size of the brushing tool.Overwrite Everything: When labeling with the brush/trace tool, you can annotate every available voxel without any regard if it was already labeled as a different segment or whether it is unlabelled. This allows you to draw over existing segments.Only Overwrite Empty Areas: In contrast to theOverwrite Everythingmodifier, the forces the brush & trace tools to only label voxels without any segment ID ("empty areas"). This is useful when annotating segments that directly touch each other to avoid accidental overwrites.2D Fill/3D Fill: Modifies the flood filling tool to work in 2D (in-plane only) or 3D (volumetric fill/re-labeling). 3D flood fill is constrained to a small, regional bounding box for performance reasons. Read more about flood fills below.
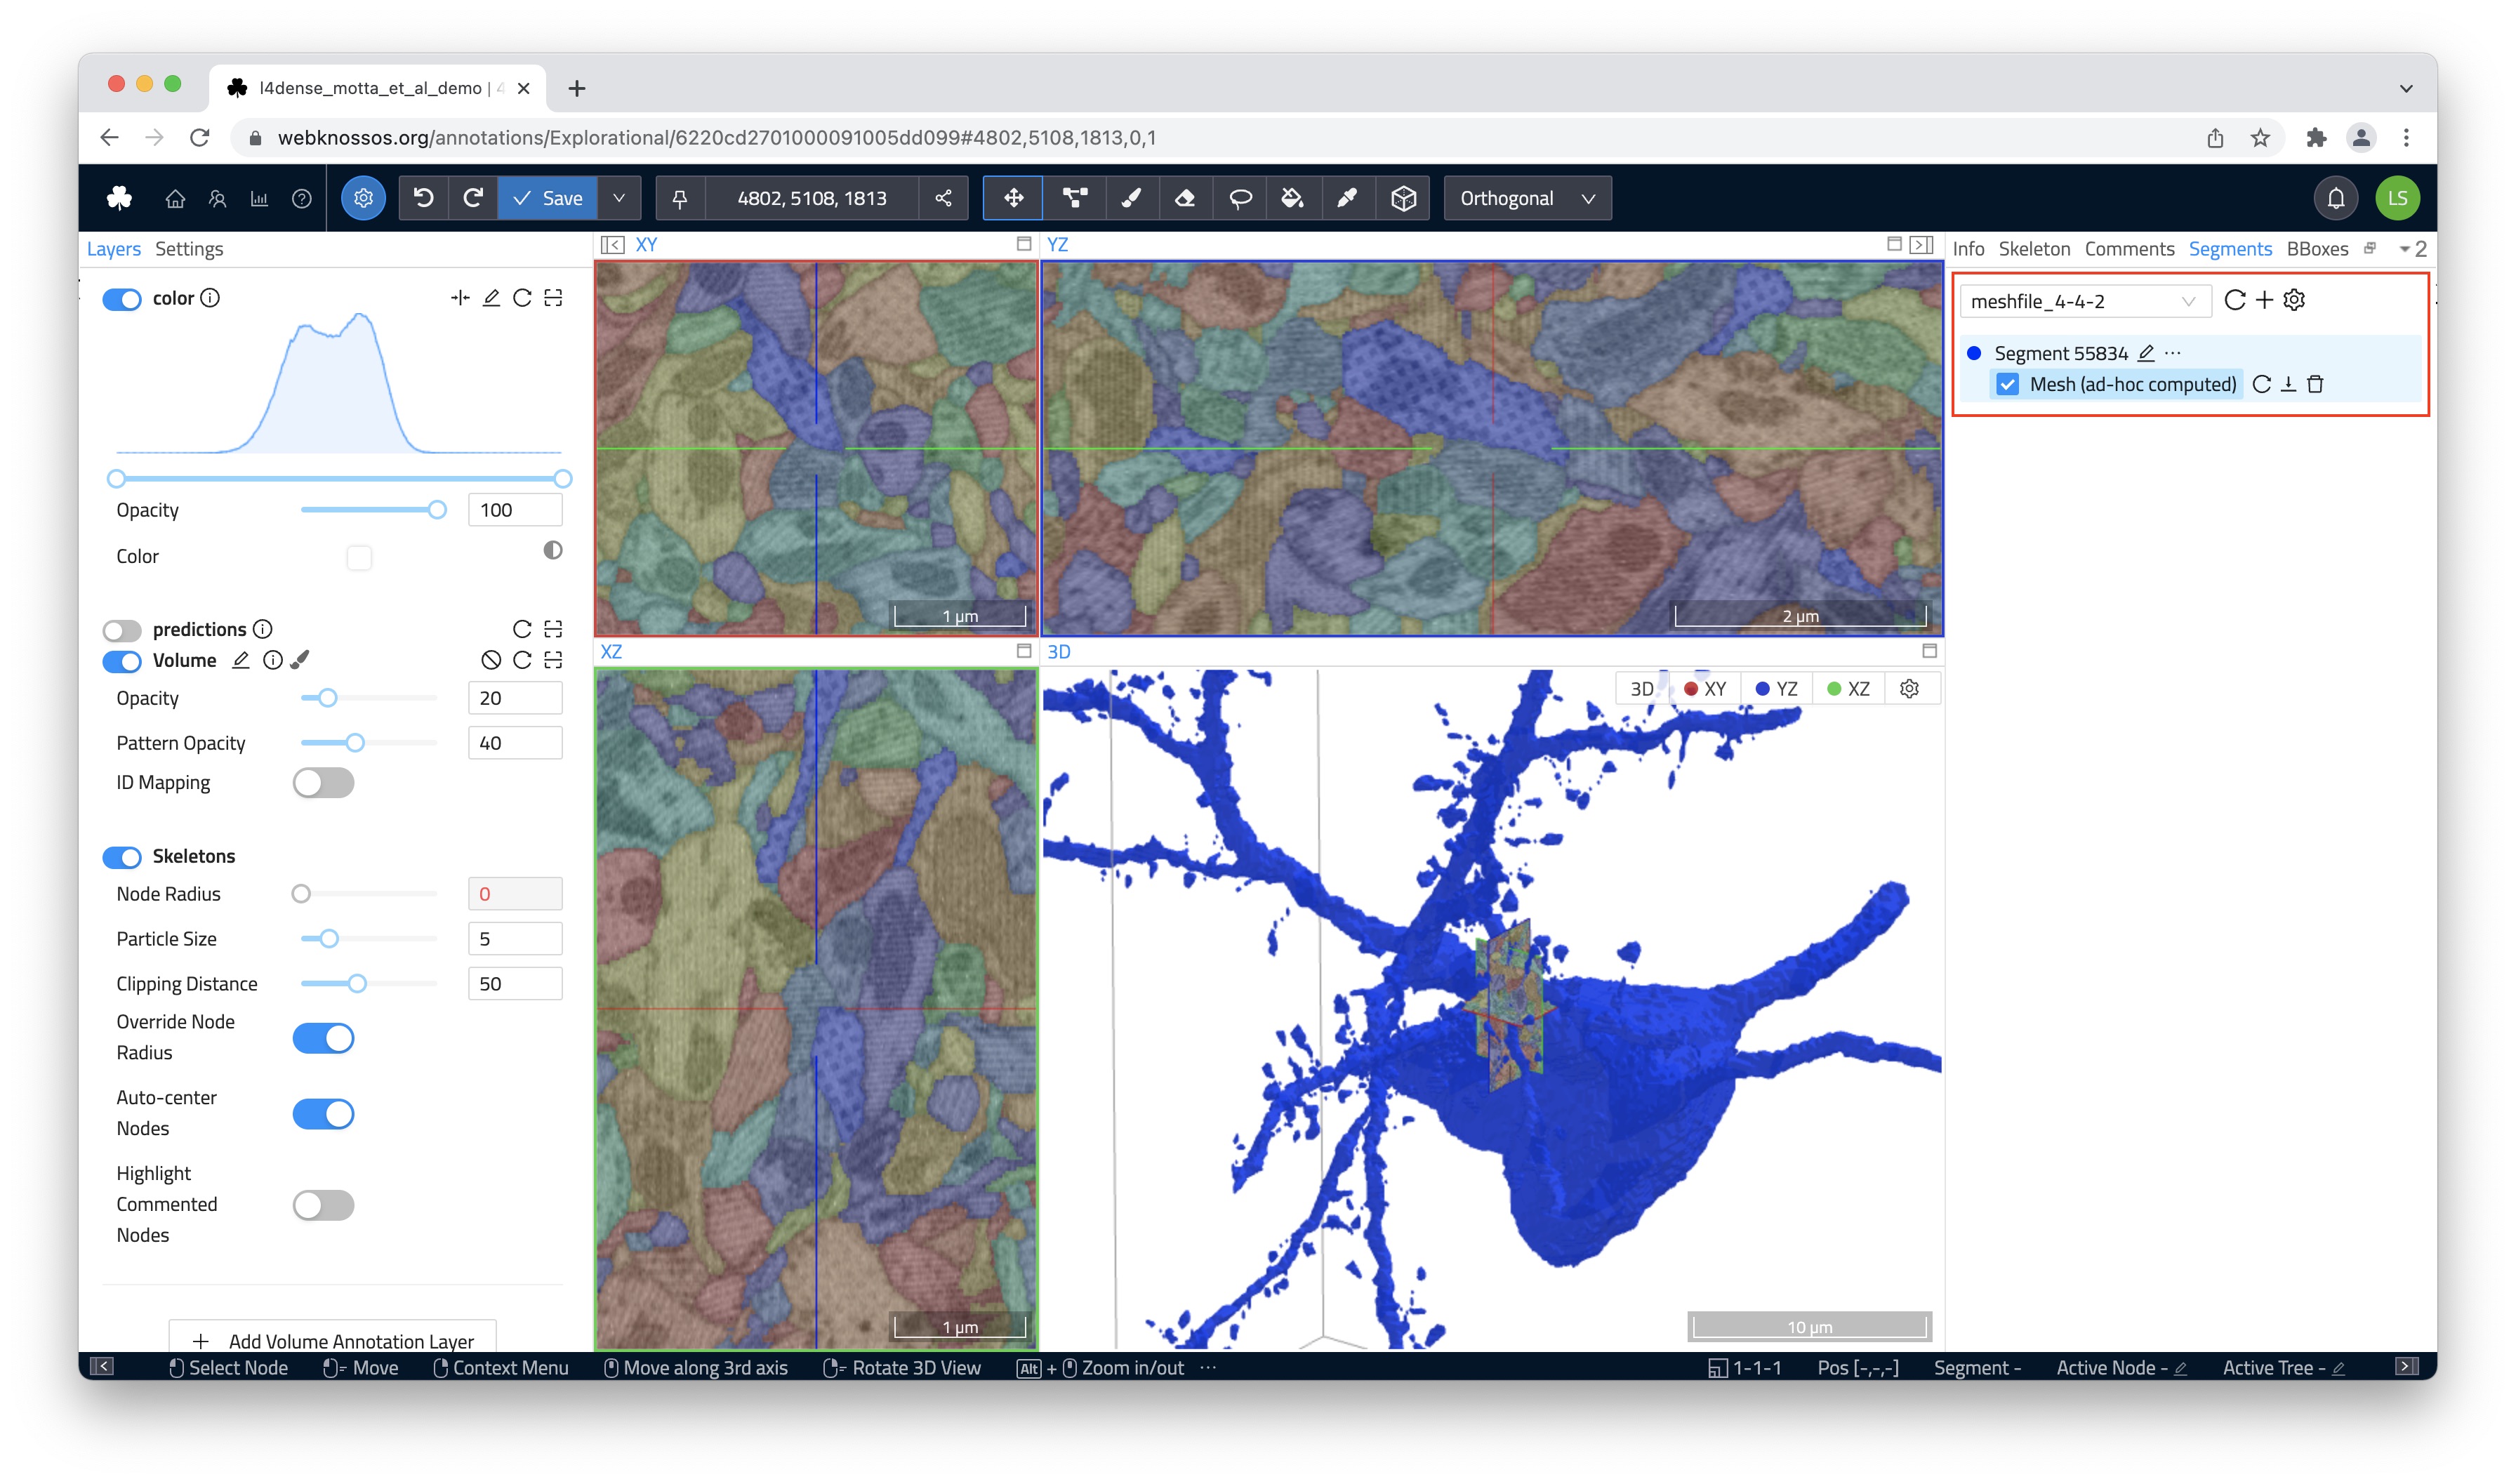
In the Segmentation tab on the right-hand side panel, you can see the segment IDs which are available in your annotation. You can rename segments as needed.
The active segment ID under the cursor can be found in the status bar at the bottom of the screen or through the context-sensitive menu on right-click.
Segments List
The right-hand side panel offers a Segments tab that lists segments and allows to edit these.
A segment is added to the list as soon as it was clicked in the data viewport.
The following functionality is available for each segment:
- jumping to the segment (via left-click; this uses the position at which the segment was initially registered)
- naming the segment
- loading 3D meshes for the segments (ad-hoc and precomputed if available)
- download of 3D meshes
- changing the color of the segment
- activating the segment id (so that you can annotate with that id)
Merging volume annotation with fallback data
After finishing the annotation of a volume layer with a fallback layer, the combined state of these layers can be materialized into a new dataset. For this, go to the layer settings in the left border tab. On the top right of the volume layer is the following button:
![]()
This button opens up a modal that starts a long-running job which will materialize the volume annotation.
Proof-Reading and Merging Segments
See the section on proofreading.
AI Quick Select
The built-in quick select tools allows you draw a selection around a cell or object and WEBKNOSSOS will use machine-learning to automatically do the segmentation for you.
The feature is based on the Segment Anything Model and works across a wide range of imaging modalities.
The AI quick select tool in combination with the volume interpolation feature speeds ups annotation workflows significantly.
To use the AI quick selection tool, select it from the toolbar at the top of the screen. Make sure the AI option is toggled (default setting) otherwise the quick select tool will default to using flood-fills which depending on your situation is also very handy.
Volume Interpolation
When using the brush or trace tool, you can use the Volume Interpolation feature for faster annotation speed (in a task context, this feature has to be enabled explicitly).
Simply label a segment in one slice (e.g., z=10), move forward by a few slices (e.g., z=14) and label the segment there.
Now, you can click the "Interpolate" button (or use the shortcut V) to interpolate the segment between the annotated slices (e.g., z=11, z=12, z=13).
Note that it is recommended to proofread the interpolated slices afterward since the interpolation is a heuristic.
Volume Extrusion
Similar to the above interpolation feature, you can also extrude the currently active segment. This means, that you can label a segment on one slice (e.g., z=10), move a few slices forward (e.g., z=12) and copy the segment to the relevant slices (e.g., z=11, z=12). In contrast to interpolation mode, WEBKNOSSOS will not adapt the shape/boundary of the extruded segments to fit between the source and target segment. Instead, the extruded volume will retain the shape of the source segment and extend that along the z-axis. The extrusion can be triggered by using the extrude button in the toolbar (also available as a dropdown next to the interpolation/extrusion button).
Volume Flood Fills
WEBKNOSSOS supports volumetric flood fills (3D) to relabel a segment with a new ID. Instead of having to relabel segment slice-by-slice, WEBKNOSSOS can do this for you. This operation allows you to fix both split and merge errors:
- For split errors: Combine two segments by relabeling one segment with the ID of the other. Since this operation is fairly compute-intensive you might be better of with the
Merger Mode, explained above. - For merge errors: You have to manually split two segments at their intersection/border, e.g. a cell boundary. Use the eraser brush and make sure to establish a clear cut between both segments on a slice-by-slice basis. Both segments must not touch any longer. Create a new segment ID from the toolbar and apply it to one of the partial segments that you just divided.
Note that due to performance reasons, 3D flood-fills only work in a small, local bounding box. For larger areas we recommend working with the proofreading tool instead.
Segment Statistics
WEBKNOSSOS provides handy statistics about your labelled segments, such as the volume and bounding box of a segment.
There is several ways to access this information:
1. Right-click any segment to bring up the context menu. The segment statistics are listed at the end of the context menu.
2. In the Segments tab in the right-hand panel, right-click on any group of segments (or the "Root" group) to bring up a context menu. Select Show Segment Statistics to access a summary table with statistics for a whole group of labelled segments. These can be exported as CSV files for further analysis outside of WEBKNOSSOS.
In cases, where you only wish to measure a simple distance or surface area, use the Measurement Tool instead.
Mappings / On-Demand Agglomeration
With WEBKNOSSOS it is possible to apply a precomputed agglomeration file to re-map/combine over-segmented volume annotations on-demand. Instead of having to materialize one or more agglomeration results as separate segmentation layers, ID mappings allow researchers to apply and compare different agglomeration strategies of their data for experimentation.
This feature works well with automated machine learning segmentation workflows. We typically produce several agglomeration results based on different prediction and size thresholds leading to several possible segmentations based on one initial over-segmentation. We load these ID maps into WEBKNOSSOS to quickly review these results in an interactive session.
Mapping files are automatically identified by WEBKNOSSOS when being placed in a agglomerates folder within the segmentation folder. All available mappings can be activated from a dropdown under each Segmentation layer. Users can easily switch between several mappings and WEBKNOSSOS will update accordingly.
Mapping files are stored as HDF5 files. Read the section on data formats for more information on the file formats.
Hybrid Annotations
A hybrid annotation contains both skeleton and volume annotations. This is the default behavior when creating a new WEBKNOSSOS annotation.
With hybrid annotations, you can use an existing skeleton as a guide to support volume annotation tasks. Alternatively, comments on skeleton nodes can be used to label/mark specific cells and positions during a volume annotation.
WEBKNOSSOS also supports pure skeleton or pure volume annotations for dedicated tasks/projects or backward compatibility.
Those can be converted to a hybrid annotation, by adding a volume/skeleton layer by clicking the Add Volume Annotation Layer button in the left-hand layers tab.